How does an Air Conditioner work

How does an Air Conditioner work?

Air conditioning has become a necessary part of modern life. Whether it’s at home, in the office, or in the car, air conditioning helps us stay cool and comfortable in the hot summer months. But have you ever wondered how an air conditioner works? In this article, we’ll take a closer look at the mechanics behind this cooling technology and explain how it keeps us cool and comfortable.

The Basics of Air Conditioning

To understand how an air conditioner works, it’s important to first understand the basics of air conditioning. At its core, air conditioning is a process that involves the removal of heat and moisture from the air. When we feel hot and uncomfortable, it’s not necessarily because the air around us is hot; it’s because the air is holding onto too much heat and moisture.

Air conditioners work by removing that excess heat and moisture from the air, leaving us with cool, dry air that feels comfortable. The process of removing heat and moisture is accomplished through a combination of mechanical and chemical processes, which we’ll explore in more detail in the following sections.

The Components of an Air Conditioner

An air conditioner is made up of several key components that work together to cool and dehumidify the air. These components include the compressor, condenser, evaporator, and expansion valve.

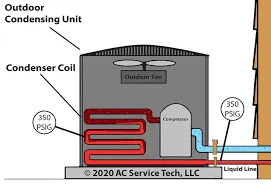
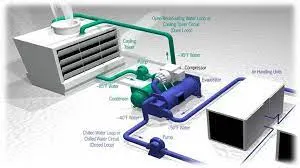
The compressor is the heart of the air conditioning system. It’s responsible for compressing the refrigerant gas, which is then circulated through the system to remove heat from the air. The condenser is a heat exchanger that helps dissipate the heat absorbed by the refrigerant gas. The evaporator is another heat exchanger that cools and dehumidifies the air as it passes over its fins. The expansion valve regulates the flow of refrigerant gas into the evaporator, allowing for precise control of the cooling process.

How Air Conditioning Works
Now that we understand the basic components of an air conditioner, let’s take a closer look at how they work together to cool and dehumidify the air.

The refrigeration cycle begins with the compressor, which compresses the refrigerant gas into a high-pressure, high-temperature state. The refrigerant gas is then sent to the condenser, where it’s cooled and condensed into a liquid. As the refrigerant cools, it releases the heat it absorbed from the air.

The liquid refrigerant is then sent to the expansion valve, which regulates the flow of refrigerant into the evaporator. As the refrigerant enters the evaporator, it rapidly expands and evaporates into a gas. This process absorbs heat from the air passing over the evaporator’s fins, cooling and dehumidifying the air.

The now-cold refrigerant gas is then sent back to the compressor to begin the cycle anew. As the cycle continues, heat and moisture are continuously removed from the air, leaving us with cool, dry air that feels comfortable.

Types of Air Conditioners
There are several different types of air conditioners, each with its own unique characteristics and advantages. The most common types of air conditioners include window units, split systems, and central air conditioning.

Window units are the most basic and affordable type of air conditioner. They’re designed to fit into a standard window frame and cool a single room or small space. Window units are easy to install and operate, making them a popular choice for small apartments and offices.

Split systems are a more advanced type of air conditioner that consists of two separate units: an indoor unit and an outdoor unit. The indoor unit contains the evaporator, while the outdoor unit contains the compressor and condenser. Split systems are more expensive than window units, but they’re also more powerful and efficient. They’re ideal for cooling larger spaces or multiple rooms.

Central air conditioning is the most powerful and comprehensive type of air conditioning system. It’s designed to cool an entire home or building using a network of ducts and vents. Central air conditioning is the most expensive type of air conditioning system, but it’s also the most efficient and effective. It provides consistent, even cooling throughout a home or building and can even improve indoor air quality by filtering out dust, allergens, and other pollutants.

Maintenance and Troubleshooting
Like any mechanical system, air conditioners require regular maintenance to keep them running smoothly. Basic maintenance tasks include cleaning or replacing air filters, checking refrigerant levels, and inspecting the system for leaks or other issues. It’s also important to have the system professionally serviced at least once a year to ensure it’s operating at peak efficiency.

If you’re experiencing issues with your air conditioner, there are several troubleshooting steps you can take before calling a professional. First, check the air filter and clean or replace it if necessary. Make sure the thermostat is set to the correct temperature and mode. Check the power supply to the unit to ensure it’s getting the correct voltage. If none of these steps resolve the issue, it’s best to call in a professional to diagnose and repair the problem.

Conclusion
Air conditioning has become an essential part of modern life, providing us with cool, comfortable air even in the hottest and most humid weather. Understanding how air conditioners work can help us appreciate the technology that makes it all possible. From the basic components of an air conditioner to the complex refrigeration cycle that cools and dehumidifies the air, air conditioning is a remarkable feat of engineering. By maintaining our air conditioning systems and troubleshooting issues as they arise, we can ensure that we continue to enjoy cool, comfortable air for years to come.

How to support spare parts for electric skateboarding

How to support spare parts for electric skateboarding

Understanding the importance of spare parts for electric skateboarding

Electric skateboarding has become a popular activity in recent years, with more and more people opting for this mode of transportation. Electric skateboards are convenient, fast, and eco-friendly, making them an attractive alternative to traditional skateboards and other forms of transportation. However, like any other device, electric skateboards are prone to wear and tear, and parts may need to be replaced or repaired over time.

Spare parts are an essential aspect of electric skateboarding, as they enable users to keep their boards in optimal condition and prolong their lifespan. Without access to spare parts, electric skateboard owners may find it difficult to fix any issues that arise and may be forced to purchase a new board altogether. This can be a costly and wasteful approach, as it not only results in unnecessary spending but also contributes to environmental damage.

Therefore, it is crucial to understand the significance of spare parts and how to support them for electric skateboarding.

Identifying common spare parts for electric skateboarding

To support spare parts for electric skateboarding, it is essential to identify the common parts that may need replacement or repair. These parts may include:

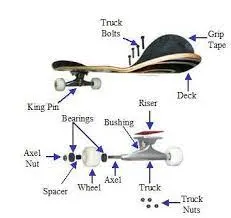
Wheels: Electric skateboard wheels are prone to wear and tear, particularly if the board is frequently used on rough surfaces or uneven terrain. Replacing the wheels when they become worn out or damaged is essential to maintain optimal performance.

Bearings: The bearings in electric skateboard wheels enable the wheels to rotate smoothly and efficiently. Over time, the bearings may become dirty, rusty, or worn out, affecting the board’s overall performance. Replacing the bearings regularly can prevent this from happening.

Battery: The battery is the heart of an electric skateboard, providing power to the motor and enabling the board to move. Replacing the battery when it no longer holds a charge or becomes damaged is crucial to ensure the board’s longevity.

Motor: The electric skateboard’s motor is responsible for powering the wheels and enabling the board to move. Over time, the motor may become damaged or worn out, affecting the board’s overall performance. Replacing the motor can help restore the board’s functionality.

Belts: The belts in electric skateboards connect the motor to the wheels, enabling the board to move. These belts are prone to wear and tear and may need to be replaced over time to maintain optimal performance.

Identifying these common parts is the first step in supporting spare parts for electric skateboarding.

Finding reliable suppliers for spare parts

Once the common spare parts for electric skateboarding have been identified, the next step is to find reliable suppliers for these parts. There are several options available, including online stores, local skate shops, and manufacturer websites.

When choosing a supplier, it is important to consider factors such as price, availability, and quality. Online stores may offer competitive prices and a wide range of products, but shipping times and costs may vary. Local skate shops may offer personalized service and quick access to parts, but prices may be higher than online stores. Manufacturer websites may offer high-quality parts at reasonable prices, but availability may be limited.

Regardless of the supplier chosen, it is important to ensure that the parts are genuine and compatible with the electric skateboard model in question. Using substandard or incompatible parts can result in further damage to the board and may even be dangerous.

Maintaining spare parts for electric skateboarding

Once spare parts for electric skateboarding have been acquired, it is essential to maintain them properly. This involves storing the parts in a safe and dry place, away from moisture, dust, and other contaminants. It is also important to keep track of when parts were last replaced and to replace them at regular intervals to prevent further damage or wear and tear.

Regular maintenance of spare parts can also help prolong the lifespan of an electric skateboard. For example, cleaning the bearings regularly can prevent dirt and debris from building up and affecting performance. Similarly, keeping the wheels clean and properly inflated can help prevent damage and ensure optimal performance.

Troubleshooting common issues with electric skateboards

Despite proper maintenance and replacement of spare parts, electric skateboards may still encounter issues over time. Some common problems include:

The board does not turn on: If the board does not turn on, check that the battery is charged and properly connected to the board. If the battery is fully charged and connected correctly, the issue may be with the motor or the remote control. In this case, it may be necessary to replace these parts.

The board does not move: If the board turns on but does not move, the issue may be with the motor or the wheels. Check that the motor is properly connected to the wheels and that the wheels are not blocked or damaged. If these parts are functioning correctly, it may be necessary to replace the motor or the belts.

The board moves slowly or inconsistently: If the board moves slowly or inconsistently, the issue may be with the battery, motor, or wheels. Check that the battery is fully charged and functioning properly. If the battery is working correctly, the issue may be with the motor or the wheels. In this case, it may be necessary to replace these parts.

The board makes strange noises: If the board makes strange noises, such as grinding or squeaking, the issue may be with the bearings or the wheels. Check that the bearings are clean and properly lubricated. If the bearings are functioning correctly, the issue may be with the wheels. In this case, it may be necessary to replace the wheels.

Conclusion:

In conclusion, supporting spare parts for electric skateboarding is essential to ensure optimal performance and longevity of electric skateboards. Identifying common parts that may need replacement, finding reliable suppliers, maintaining spare parts properly, and troubleshooting common issues can help electric skateboard owners keep their boards in excellent condition. By following these guidelines, electric skateboard owners can enjoy a safe, eco-friendly, and cost-effective mode of transportation for years to come.

How often do you replace Ring Doorbell battery

How often do you replace Ring Doorbell battery

The Ring Doorbell is a popular home security device that has gained a lot of popularity in recent years. One of the most important aspects of the Ring Doorbell is its battery life. The battery powers the device, allowing it to function properly, so it is essential to know how often to replace it. The frequency of replacement depends on a few factors, such as the number of people who use the device, how frequently the device is used, and the specific model of the Ring Doorbell.

First and foremost, it is important to understand that the battery life of the Ring Doorbell can vary depending on the model. For example, the Ring Doorbell 3 has a battery life of up to six months, while the Ring Doorbell 4 has a battery life of up to one year. It is essential to check the user manual or the Ring website for specific information about the battery life of your device.

Another factor that affects the frequency of battery replacement is how frequently the device is used. If the Ring Doorbell is used frequently, the battery will drain much faster than if it is only used occasionally. For example, if the Ring Doorbell is used every time someone comes to the door, the battery will need to be replaced more often than if it is only used a few times a week.

Additionally, the number of people who use the device can also affect the battery life. If there are many people in your household, and each person uses the device frequently, the battery will drain faster. This is because each time someone uses the Ring Doorbell, the battery is used, and it drains a little bit more.

One of the most significant factors that affect the battery life of the Ring Doorbell is the type of activity that triggers it. For instance, if the device is set up to detect every movement or sound, the battery life will likely be shorter than if it is set up to only detect specific motions. The type of activity the device is set to detect can be adjusted through the Ring app.

To ensure that the Ring Doorbell battery lasts as long as possible, there are a few steps you can take. One of the best ways to extend the battery life is to adjust the settings on the device to limit the number of events that trigger it. For example, you can set it to only detect motion in certain areas, or you can adjust the sensitivity so that it only detects larger movements.

Another way to extend the battery life is to turn off some of the device’s features that you don’t need. For instance, the Live View feature, which allows you to see what is happening in real-time, can use up a lot of battery life. If you don’t need this feature, turn it off to extend the battery life.

It is also essential to keep the Ring Doorbell clean and dry. Over time, dust and debris can accumulate on the device, which can affect its battery life. To keep the device clean, use a soft, dry cloth to wipe it down regularly. Additionally, if the device is exposed to rain or other moisture, dry it off as soon as possible to prevent damage to the battery.

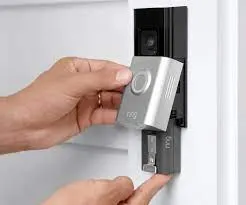
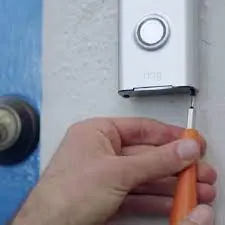
In terms of replacing the battery, the process is relatively straightforward. First, you will need to purchase a new battery. The battery can be purchased from the Ring website or from a retailer that sells Ring devices. Once you have the new battery, you will need to remove the old battery from the Ring Doorbell. To do this, open the Ring Doorbell’s faceplate and slide the battery out. Then, slide the new battery in and close the faceplate.

In conclusion, the frequency with which you replace the Ring Doorbell battery depends on several factors such ad the model of the Ring Doorbell, the frequency of use, the number of people using the device

Can a dishwasher last 30 years

Can a dishwasher last 30 years?

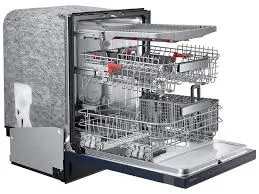
Dishwashers are an essential appliance in any modern kitchen. They have evolved over the years from being just a luxury to becoming a necessity for most households. The lifespan of a dishwasher is an essential factor to consider when making a purchase. The question that many people ask is, can a dishwasher last 30 years? In this article, we will explore the different factors that determine the lifespan of a dishwasher and answer the question of whether it is possible for a dishwasher to last for 30 years.

Factors that Affect the Lifespan of a Dishwasher

The lifespan of a dishwasher depends on several factors, including the brand, the quality of construction, and the usage. Below are some of the factors that affect the lifespan of a dishwasher:

Quality of construction

The quality of construction is one of the most critical factors that determine the lifespan of a dishwasher. A dishwasher made of high-quality materials is likely to last longer than one made of cheap materials. Stainless steel dishwashers are more durable than plastic dishwashers. Additionally, a dishwasher with a solid interior construction will withstand years of use without breaking down.

Brand

The brand of a dishwasher is also a significant factor that determines its lifespan. Some brands are known for making high-quality, durable dishwashers that last for decades. These brands use top-quality materials in their construction, ensuring that they can withstand years of use without breaking down. Other brands may make dishwashers with subpar materials, leading to shorter lifespans.

Usage

The way you use your dishwasher can also affect its lifespan. Dishwashers that are used frequently and have heavy loads are more likely to break down faster than those that are used less frequently. Additionally, dishwashers that are not properly maintained, including regular cleaning and maintenance, are more likely to break down faster than those that are.

The Average Lifespan of a Dishwasher

The average lifespan of a dishwasher is around 9-10 years. This lifespan is based on the assumption that the dishwasher is used regularly and adequately maintained. However, some dishwashers can last for much longer than this, with some lasting up to 20 years or more. The lifespan of a dishwasher also depends on the factors discussed above, such as the quality of construction, brand, and usage.

How to Extend the Lifespan of Your Dishwasher

While the lifespan of a dishwasher depends on several factors, there are steps that you can take to extend the lifespan of your dishwasher. Here are some tips to help you keep your dishwasher in good condition:

Regular cleaning and maintenance

Regular cleaning and maintenance are essential for keeping your dishwasher in good condition. Clean the dishwasher regularly, including the filters, and interior. You should also remove any food debris that may be stuck in the dishwasher.

Load the dishwasher correctly

Loading the dishwasher correctly is essential for ensuring that it functions correctly and lasts longer. Make sure that you don’t overload the dishwasher or place items in it that are too large or too dirty. Additionally, make sure that you use the correct detergent and rinse aid.

Repair issues promptly

If you notice any issues with your dishwasher, such as leaks or unusual noises, repair them promptly. Leaving these issues unresolved can lead to more significant problems and may shorten the lifespan of your dishwasher.

Signs that Your Dishwasher Needs Replacing

While dishwashers can last for many years, there comes a time when you need to replace them. Here are some signs that your dishwasher may need replacing:

It’s not cleaning dishes properly

If your dishwasher is not cleaning dishes properly, even after cleaning and maintenance, it may be time to replace it. This may be due to worn-out components or issues with the motor.

It’s leaking

A leaking dishwasher is a significant issue that should not be ignored. It can lead to water damage in your kitchen, and the leaking may be a sign that the dishwasher is beyond repair.

It’s making unusual noises

Unusual noises coming from your dishwasher, such as grinding or clunking sounds, may be a sign that it needs replacing. These noises may indicate that the motor or other components are worn out and need replacing.

Rust and corrosion

Rust and corrosion on the dishwasher’s interior or exterior may be a sign that it needs replacing. These issues may indicate that the dishwasher has reached the end of its lifespan.

Conclusion

In conclusion, the lifespan of a dishwasher depends on several factors, including the quality of construction, brand, and usage. While the average lifespan of a dishwasher is around 9-10 years, some dishwashers can last for much longer than this. Taking steps to maintain your dishwasher properly, such as regular cleaning and maintenance, can help extend its lifespan. However, there comes a time when your dishwasher may need replacing. Signs that your dishwasher may need replacing include not cleaning dishes properly, leaking, making unusual noises, and rust and corrosion. If you’re in the market for a new dishwasher, make sure to choose a high-quality brand with a solid construction to ensure it lasts as long as possible.

At what age should a dishwasher be replaced

At what age should a dishwasher be replaced?

A dishwasher is an essential appliance in any modern kitchen. It saves time and effort while ensuring that dishes and utensils are cleaned and sanitized effectively. However, like any other machine, a dishwasher has a limited lifespan. With time, wear and tear will cause the appliance to break down or become less efficient. In this article, we will discuss the factors that determine when a dishwasher should be replaced.

Age of the dishwasher

The age of a dishwasher is a crucial factor in determining when it should be replaced. Typically, the average lifespan of a dishwasher is around 10 years. However, this can vary depending on the brand, model, and frequency of use. Some high-end models may last longer, while low-end models may break down within a few years. It’s important to note that the older a dishwasher gets, the more likely it is to break down or require costly repairs.

Frequency of use

Another factor that affects the lifespan of a dishwasher is how frequently it is used. If the dishwasher is used daily, it is more likely to wear out faster than one that is used less frequently. It’s essential to pay attention to the manufacturer’s recommended usage guidelines when purchasing a dishwasher. If you have a large family or entertain frequently, you may want to invest in a dishwasher with a higher capacity to handle the increased workload.

Maintenance and repairs

Proper maintenance and repairs can help extend the life of a dishwasher. Regular cleaning, such as removing food debris from the filter and wiping down the interior, can prevent clogs and ensure that the dishwasher runs efficiently. Additionally, if a dishwasher is making strange noises or not cleaning dishes effectively, it may need to be repaired. It’s important to address any issues promptly to avoid further damage and potential safety hazards.

Energy efficiency

Energy efficiency is another factor to consider when deciding whether to replace a dishwasher. Older models may not be as energy-efficient as newer ones, leading to higher utility bills. Additionally, some municipalities offer rebates or incentives for purchasing energy-efficient appliances, which can offset the cost of a new dishwasher. When shopping for a new dishwasher, look for models with the Energy Star label, which indicates that the appliance meets the U.S. Environmental Protection Agency’s energy efficiency guidelines.

Cost of repairs

Ultimately, the decision to replace a dishwasher often comes down to the cost of repairs. If the cost of repairing the dishwasher is more than the cost of a new one, it may be more cost-effective to replace the appliance. Additionally, if the dishwasher is old and has already had multiple repairs, it may be more practical to invest in a new one rather than continuing to spend money on repairs.

In conclusion, the age of a dishwasher, frequency of use, maintenance and repairs, energy efficiency, and cost of repairs are all factors to consider when deciding whether to replace a dishwasher. While the average lifespan of a dishwasher is around 10 years, the actual lifespan can vary depending on several factors. Proper maintenance and repairs can help extend the life of a dishwasher, but eventually, all appliances will need to be replaced. By considering the factors mentioned above, you can make an informed decision about when to replace your dishwasher and ensure that your kitchen remains a functional and efficient space.

Tips for choosing a new dishwasher

If you have decided that it’s time to replace your dishwasher, there are a few factors to consider when choosing a new one. Here are some tips to help you make an informed decision:

Capacity:

The capacity of a dishwasher is measured in place settings, which refers to the number of dishes and utensils it can hold. Consider your household’s size and how often you entertain when choosing a capacity. A larger capacity dishwasher can save you time and energy if you need to wash a lot of dishes frequently.

Energy Efficiency:

As mentioned earlier, energy efficiency is an essential factor to consider when choosing a new dishwasher. An energy-efficient dishwasher can save you money on utility bills and help reduce your environmental impact. Look for models with the Energy Star label, which indicates that the dishwasher meets the energy efficiency guidelines set by the EPA.

Noise Level:

If your kitchen is open to other areas of your home, you may want to consider the noise level of a new dishwasher. Some models are designed to run quietly, which can be a significant factor if you have young children or work from home.

Brand and Model:

It’s essential to research different brands and models when choosing a new dishwasher. Look for reviews from other consumers and consider the reputation of the brand. Additionally, consider the features of each model, such as wash cycles, drying options, and special features like a third rack or a built-in water softener.

Price:

The price of a dishwasher can vary widely depending on the brand, model, and features. Set a budget before you start shopping and look for models that fit within your price range. Keep in mind that investing in a higher-end dishwasher can pay off in the long run with increased energy efficiency and longevity.

Conclusion

In summary, a dishwasher is an essential appliance in any kitchen, but it has a limited lifespan. When deciding whether to replace your dishwasher, consider the age, frequency of use, maintenance and repairs, energy efficiency, and cost of repairs. By paying attention to these factors, you can make an informed decision about when to replace your dishwasher and choose a new one that meets your household’s needs. Remember to consider the capacity, energy efficiency, noise level, brand and model, and price when choosing a new dishwasher. With proper maintenance and care, a new dishwasher can last for many years and make your kitchen a more functional and efficient space.


Can Solar Lights Charge on a Cloudy Day

Can Solar Lights Charge on a Cloudy Day?

Solar lights have become increasingly popular in recent years as people become more aware of the need to conserve energy and reduce their carbon footprint. One question that often arises, however, is whether or not solar lights can charge on a cloudy day. After all, if the sun is not shining, how can solar panels gather energy? In this article, we will take a closer look at how solar lights work, whether they can charge on a cloudy day, and what factors can affect their performance.

How do Solar Lights Work?

Before we delve into the question of whether or not solar lights can charge on a cloudy day, it is important to understand how these devices work. Solar lights are powered by photovoltaic cells, which are also known as solar cells. These cells are made of semiconducting materials, such as silicon, that can convert sunlight into electricity. When sunlight hits the surface of a solar cell, it excites the electrons in the material, causing them to flow through a circuit and generate electricity.

Solar lights are typically made up of four main components: the solar panel, the battery, the LED light, and the controller. The solar panel is the component that captures sunlight and converts it into electricity. This electricity is then stored in a battery, which powers the LED light. The controller regulates the flow of electricity between the solar panel and the battery, ensuring that the battery is charged when there is sufficient sunlight and that the LED light is illuminated when it is dark.

Can Solar Lights Charge on a Cloudy Day?

Now that we have a better understanding of how solar lights work, let’s explore whether or not they can charge on a cloudy day. The short answer is yes, solar lights can charge on a cloudy day, but their performance will be affected by the amount of sunlight that is available. Solar panels are designed to work best in direct sunlight, but they can still gather energy even on a cloudy day.

The amount of energy that a solar panel can gather on a cloudy day will depend on a few different factors. One of the most important factors is the thickness and density of the cloud cover. Thicker clouds will block more sunlight, which means that less energy will be available for the solar panel to convert into electricity. In addition, the angle of the sun can also affect the amount of energy that is available. If the sun is low in the sky, the solar panel will receive less energy than if it is high in the sky.

Another factor that can affect the performance of solar lights on a cloudy day is the quality of the solar panel itself. Higher-quality solar panels are more efficient at converting sunlight into electricity, which means that they will be able to generate more energy even in cloudy conditions. In addition, some solar panels are designed to be more sensitive to low-light conditions, which can help to improve their performance on cloudy days.

Factors that Affect the Performance of Solar Lights

In addition to the amount of sunlight that is available, there are several other factors that can affect the performance of solar lights. These include:

Temperature: Solar panels work best at moderate temperatures. If the temperature is too hot, the efficiency of the solar panel can decrease, which can lead to reduced performance. On the other hand, if the temperature is too cold, the battery may not be able to hold a charge, which can also reduce performance.

Shading: Solar panels need to be exposed to direct sunlight in order to generate electricity. If there is shading from trees, buildings, or other objects, the performance of the solar panel will be reduced.

Battery Capacity: The capacity of the battery can also affect the performance of solar lights. If the battery is not large enough to store enough energy, the light may not be able to illuminate for as long as desired. It is important to choose a solar light with a battery that is appropriately sized for the desired use.

Maintenance: Solar panels and batteries require regular maintenance to ensure that they are functioning properly. Dust, debris, and other contaminants can accumulate on the surface of solar panels, reducing their efficiency. Batteries may need to be replaced periodically to maintain optimal performance.

Location: The location of solar lights can also affect their performance. Lights that are installed in areas with high levels of air pollution or smog may not receive as much sunlight as lights installed in areas with clear skies.

Tips for Maximizing the Performance of Solar Lights

While solar lights can charge on a cloudy day, there are several steps that you can take to maximize their performance. Here are a few tips:

Choose high-quality solar panels: High-quality solar panels are more efficient at converting sunlight into electricity, which means that they will be able to generate more energy even in cloudy conditions.

Position solar lights in a sunny location: It is important to position solar lights in a location where they will receive as much sunlight as possible. This may mean placing them in an area that is free from shading or installing them in a location that receives direct sunlight for most of the day.

Keep solar panels clean: Regularly cleaning the surface of solar panels can help to maximize their efficiency.

Choose a solar light with a large battery: Solar lights with larger batteries will be able to store more energy, which means that they will be able to illuminate for longer periods of time.

Use LED lights: LED lights are more energy-efficient than traditional incandescent bulbs, which means that they will be able to run for longer periods of time on the same amount of energy.

Conclusion

In conclusion, solar lights can charge on a cloudy day, but their performance will be affected by the amount of sunlight that is available. The thickness and density of the cloud cover, the angle of the sun, and the quality of the solar panel can all affect how much energy a solar light is able to gather. To maximize the performance of solar lights, it is important to choose high-quality solar panels, position lights in a sunny location, keep solar panels clean, choose a solar light with a large battery, and use LED lights. With proper maintenance and care, solar lights can provide a cost-effective and environmentally friendly way to illuminate outdoor spaces.


How to connect your TCL smart TV

How to connect your TCL smart TV

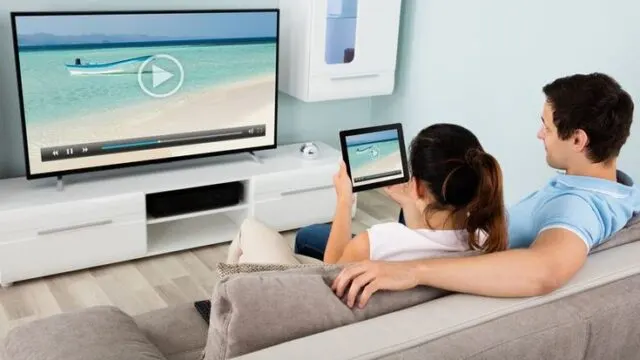
TCL is one of the world’s leading manufacturers of televisions, and their smart TVs offer a great viewing experience. However, setting up your TCL smart TV can be challenging, especially if you are not tech-savvy. In this article, we will guide you through the process of connecting your TCL smart TV to the internet and other devices.

Connecting Your TCL Smart TV to the Internet

The first step in connecting your TCL smart TV is to connect it to the internet. Here’s how to do it:

Step 1: Power up your TCL smart TV and press the Home button on your remote.

Step 2: Select the Settings icon and then click on Network.

Step 3: Select Wired or Wireless, depending on your internet connection.

Step 4: If you choose Wired, connect one end of an Ethernet cable to your TV and the other end to your router. If you choose Wireless, select your home network from the list of available networks and enter your password.

Step 5: Once your TCL smart TV is connected to the internet, you can access various apps, stream content, and browse the web.

Connecting Your TCL Smart TV to a Soundbar

If you want to enhance your audio experience while watching TV, you can connect your TCL smart TV to a soundbar. Here’s how to do it:

Step 1: Power up your TCL smart TV and your soundbar.

Step 2: Connect one end of an HDMI cable to the HDMI ARC port on your soundbar and the other end to the HDMI ARC port on your TCL smart TV.

Step 3: On your TCL smart TV, go to Settings > Sound > Sound Output > HDMI ARC.

Step 4: Select your soundbar from the list of available devices.

Step 5: Once your TCL smart TV is connected to your soundbar, you can enjoy a better audio experience while watching TV.

Connecting Your TCL Smart TV to a Game Console

If you’re a gamer, you can connect your game console to your TCL smart TV to enjoy gaming on a bigger screen. Here’s how to do it:

Step 1: Power up your game console and your TCL smart TV.

Step 2: Connect one end of an HDMI cable to the HDMI port on your game console and the other end to an available HDMI port on your TCL smart TV.

Step 3: On your TCL smart TV, go to Settings > Inputs > HDMI.

Step 4: Select the HDMI port where your game console is connected.

Step 5: Once your TCL smart TV is connected to your game console, you can enjoy gaming on a bigger screen.

Using Your TCL Smart TV Remote as a Universal Remote

Did you know that you can use your TCL smart TV remote as a universal remote to control other devices? Here’s how to do it:

Step 1: Power up your TCL smart TV and the device you want to control with your remote.

Step 2: Press and hold the Home button on your TCL smart TV remote.

Step 3: Select Universal Remote from the list of options.

Step 4: Follow the on-screen instructions to set up your universal remote.

Step 5: Once your universal remote is set up, you can use your TCL smart TV remote to control other devices, such as your cable box or soundbar.

Troubleshooting Common TCL Smart TV Connection Issues

Sometimes, you may encounter issues when connecting your TCL smart TV to the internet or other devices. Here are some common issues and their solutions:

Issue 1: TCL smart TV cannot connect to the internet.

Solution: Make sure your internet connection is working and that your TCL smart TV is within range of your router. If the problem persists, try restarting your TCL smart TV and your router.

Issue 2: Soundbar is not working with TCL smart TV.

Solution: Make sure your soundbar is properly connected to your TCL smart TV using an HDMI ARC cable. Also, check if your soundbar is turned on and the volume is not muted.

Issue 3: Game console is not working with TCL smart TV.

Solution: Make sure your game console is properly connected to your TCL smart TV using an HDMI cable. Also, check if your game console is turned on and the TV is set to the correct input.

Issue 4: Universal remote is not working with other devices.

Solution: Make sure your universal remote is properly set up and that you have followed the on-screen instructions correctly. Also, make sure the device you want to control with your remote is compatible with your TCL smart TV remote.

Conclusion

In conclusion, connecting your TCL smart TV to the internet and other devices can seem overwhelming, but it is a straightforward process. By following the steps outlined in this article, you can easily connect your TCL smart TV to the internet, a soundbar, a game console, and even use your remote as a universal remote. If you encounter any issues, refer to the troubleshooting section to resolve the problem. With your TCL smart TV connected, you can enjoy a vast range of entertainment options and a better viewing experience.


How Much Does The Onewheel Cost

How Much Does The Onewheel Cost ? — Recognize the Reason for Its Exorbitant Price

Have you ever wonder How much does the onewheel cost? Onewheel boards are motorized personal transportation vehicles that allow the rider to stay balanced on one wheel without toppling over. They range in price from $250 to $400. The motor and balancing technology, according to our team of specialists, is responsible for the majority of the motor’s cost. This is why models as inexpensive as hoverboards or even electric scooters are tough to come by.

  • What Is A Onewheel, Exactly?

If you’re unfamiliar with the onewheel, let me explain. Onewheel is a single-wheel self-balancing electric board, sometimes known as an electric skateboard, as the name implies. If you enjoy snowboarding or skateboarding, onewheel is an excellent choice.

Even though learning how to use it properly takes some time, once you get the hang of it, it’s a lot of fun. It’s also highly adaptable, allowing it to ride in a variety of situations with ease and speed. Trail rides, the beach, grass, and sidewalk are all options.

Riding a Onewheel is a fun way to go about town, and its lightweight design makes it one of the most portable electric unicycles available. However, there is a cost. The larger Onewheel GT costs $2.200 before tax, while the smaller Onewheel Pint costs $1050 before tax. This is before you install any attachments or safety equipment, which I strongly advise you to do:

  • Future Motion offers the Onewheel Pint for $1050 and the GT for $2.200, both with free delivery. Add tax and extra equipment like a fender, a stand, and a charging socket to the price.
  • The freshly announced 2021 Onehweel GT, with a starting price of $2.200, is the most costly Onewheel. The GT Freeride Bundle with a treaded tire, which includes a fender, bumpers, rail guard, and the hypercharger, costs $2.635.
  • The firm and manufacturer behind the Onewheel, Future Motion Inc., has brought a highly innovative product to market. Alternatives to the Onewheel are on the way, but no other manufacturer comes close in terms of quality, performance, and rideability at this moment.
  • Electric unicycles, or EUC, are a product closely connected to the Onewheel that has experienced a lot of growth in recent years. These gadgets continue to cost a lot of money.

The expense of just manufacturing and producing these boards is another factor in pricing. A plant in San Jose handles the manufacture and assembly. Where various components are assembled and tested before being distributed to clients all over the world.

The overhead cost includes not just the components and manufacturing costs, but also all the research, patent legal expenses, and years of designing, developing, and manufacturing Onewheel prototypes.

People readily spend large money on their automobiles, iPhones, and ski trips, to put the expense into perspective. In that light, $950 seems like a reasonable payment for the opportunity to float about towards the sunset.

When you consider it, buying a Onewheel, a device that most riders will most likely use for at least a few years, doesn’t seem that horrible.

For commuting, I combine my skateboard with my electric scooter. It’s a last-mile gadget that’ll never be able to completely replace an automobile. So I’m not going to make that connection. In the city, I believe it can easily replace the bus or bicycle.

  • How Much Is Onewheel’s Price Range?

Obviously, being the highly technological skateboard that it is, it will not be inexpensive. If you’ve ever ridden a onewheel, you’re fully aware of how thrilling it is, as well as how advanced the technology is. If you enjoy riding a onewheel, purchasing one is a wise investment. The price of a onewheel varies from $950 to $1799, depending on the model. The Onewheel pint and the Onewheel XR are available. Upgraded Onewheel Carbon Fender may be added to them as well. A side-by-side comparison of both goods may be seen at this link. However, as long as you enjoy it, it is well worth the money because it provides far more value than you pay for.

  • What Are the Advantages of Purchasing a Onewheel?

If you enjoy skating, a onewheel is a must-have item. But, if you want a sneak peek at the advantages of a onewheel, here it is:

It’s easier to weave your way around: When it comes to turning, one wheel is a lot easier than skating. You can maintain your balance while spinning and weaving your way around with ease.

Can get to a destination faster: One wheel is also quite quick, capable of reaching speeds of up to 12 miles per hour.

Can upgrade the firmware of the board: One wheel’s app offers a great function that allows users to update the firmware of the board. As a result, you’ll be able to change your board as they provide more personalization options in the future.

Has a personalization app: With the onewheel app, you may personalize your board to your liking. As a result, by altering the parameters, you may customize the board to your liking. That’s really awesome!

It has a decent battery life and charging speed, with a range of 16-18 miles for the XR and 6-8 miles for the Pint. On the other hand, it just takes 20 minutes to refuel. So you won’t have to wait long for it to recharge, and you’ll be able to get back to shredding around town or on the trails right away. 

  • Is it Worth It to Buy a Onewheel?

If you enjoy riding it and find it thrilling, the answer is obvious…duh! It is well worth the money. The Onewheel is a very versatile skateboard that is well worth the money. The cost is insignificant in comparison to the benefits it provides. When you consider all of the benefits, you’ll see that it’s well worth the money. If you can’t afford it right now, put money aside to buy it later as an investment.

CONCLUSION

So, now that you’ve gotten enough information and advice, you can determine whether or not you want to get a onewheel. If you have the funds, it is unquestionably a wise investment! Are you ready to purchase one? 


Should You Wear A Life Jacket While Kayaking? (The Real Facts)

Numerous individuals have a passion for kayaking. There’s a good chance you’ve pondered kayaking, regardless of your kayaking experience.

Kayaking is a challenging and entertaining pastime. It is an excellent way to burn calories, appreciate nature, and exercise. However, you will not be able to enjoy the sport without a safety equipment.

We will discuss life jackets in this article. If you intend to go kayaking, you should be aware of the various varieties of life jackets available.

Here’s the answer to the question, “Are life jackets required on kayaks?”

Yes, life jackets are essential when paddling a kayak. The majority of kayak rental businesses give life jackets at no additional cost. If you are paddling your own kayak, you should also bring a life jacket.

A life jacket can assist you if you are thrown from your kayak. It will float and maintain your buoyancy as you recover. Kayaking on whitewater requires the use of life vests. No of the style of kayaking you perform, you should always wear one before entering the water.

What Marine Laws Say About Kayak Life Jackets

Kayaking is generally prohibited without a life jacket, although state boating regulations vary. The United States Coast Guard (U.S.C.G.) mandates that all kayakers use a wearable and operable personal flotation device (P.F.D.) that has been approved by the U.S.C.G.

The PFD must be the correct size and in good condition for the intended wearer. Here are some considerations:

  • The United States Coast Guard (U.S.C.G.) mandates that all boaters have a wearable and operable life jacket on board their vessel.
  • The U.S.C.G. also requires that children under the age of 13 must wear an approved life jacket when on a canoe, kayak, or other vessel.
  • In New York, for example, all vessel operators and passengers are required to wear a life jacket from November 1 to May 1.
  • There are many sizes and styles of life jackets. Ensure that you choose a life jacket that fits you properly and is designed for the type of boating you intend to conduct.

Saves lives when kayakers wear life jackets Life

Life jackets save lives. According to statistics by the United States Coast Guard, wearing a life jacket reduces the chance of drowning by approximately 80%. When paddling on wide water, it is also prudent to have a float plan.

So, if something occurs and you become separated from your kayak, someone will be able to locate you. Remember to always wear a life jacket when paddling on a body of water. It might be lifesaving.

Easier Rescue And Visibility

As a paddler, you understand the importance of having a properly sized life jacket. However, did you know that wearing a jacket makes it simpler for rescuers to locate you? The buoyancy of the jacket keeps you afloat and increases your visibility in the water.

In addition, if you are engaged in an accident, the jacket will help prevent injury. When paddling in an area where collisions are possible, always wear a life jacket. In addition, you should always have a device that may be thrown, such as a life ring or a flare, in case you need to signal for assistance.

Lastly, remember to attach your paddle to your life jacket! Thus, you won’t have to worry about losing your paddle if you wind yourself in the water.

Remember that wearing a life jacket is not solely for your own protection. It is also about making it easier for rescuers to locate you in the event of an emergency. Wear a life jacket at all times when paddling!

What Is the Appropriate PFD for Kayaking?

There are numerous varieties of life jackets available on the market, and it is essential to select one that is comfortable and fits properly. For paddling, search for a life jacket with bigger armholes and a full range of arm mobility.

Adjustable straps are necessary for the life jacket to fit snugly and close to the body. Here are some guidelines for selecting the appropriate life jacket:

  • Ensure that the life vest fits properly. It should allow for free movement and fit snugly but not too tightly.
  • Select a life vest that is comfortable to wear. You’ll be wearing it for several hours, so it shouldn’t be excessively large or restricting.
  • Consider the weather and conditions you will encounter when kayaking.
  • Choose a life jacket with an integrated hood or made of insulating material if you will be kayaking in chilly water.
  • Ensure that the life vest has the appropriate U.S. Coast Guard rating for the type of kayaking you will be conducting.

Is It Dangerous to Wear a Life Vest?

Yes, there is generally some risk associated with wearing a life jacket. In a rare instances, they can even be fatal. Straps on life jackets can become entangled and strangle the wearer.

If you fall into the water while wearing a life jacket, the garment may fill with water and pull you beneath the surface. The majority of the time, though, life jackets save lives.

Wearing a life jacket dramatically increases your chances of survival in the sea, according to Petty Officer 1st Class Crystalynn Kneen. “You do not need to be a strong swimmer to live. Life jackets are effective for all.”

Why don’t kayakers use life vests?

Some kayakers prefer not to wear life jackets due to discomfort or the belief that they are competent swimmers. However, life jackets should always be used for safety.

Although it is theoretically required by law in some places, there are several reasons why kayakers may not wear life jackets. One reason is because kayaks and other personal watercraft (PWC) are built to be inherently stable, thus novices are unlikely to capsize.

Additionally, kayakers often paddle in very calm water, so the risk of drowning is low. Moreover, many kayaks include enclosed cabins that give additional weather protection.

How do kayak life vests function?

The purpose of kayak life jackets is to give float and head and neck support in the case of an accident. They are often constructed from buoyant materials, such as foam or kapok, and may have a variety of harnesses and other safety and comfort elements.

  • The body of the life jacket provides flotation and torso support, while the head support helps keep the head and neck above water.
  • Many kayak life jackets also contain a variety of straps and other features. Adjustable straps, for example, ensure a secure and comfortable fit.

Should You Use A Life Vest?

The majority of states mandate that individuals of a particular age wear life jackets while kayaking, canoeing, or paddleboarding. Some states additionally have special life jacket rules for sailboats.

Officers of the law may issue tickets to individuals who break these laws. Wearing a life jacket is one of the most important safety precautions whether kayaking, canoeing, or paddleboarding.

Life jackets provide buoyancy and aid in keeping your head above water in the event of a capsize or fall from a boat. Hypothermia, which is induced by exposure to cold water, can also be prevented by wearing a life vest.

If you are obliged to wear a life jacket when kayaking, canoeing, or paddleboarding, ensure that it fits properly and is in good condition. On the U.S. Coast Guard’s Boating Safety website, you may discover more information about selecting the proper life jacket.

What Should You Wear Instead if Not? 

The majority of kayakers wear life jackets when paddling. Life jackets give float and aid in kayakers’ safety during capsizes and other emergencies. Nevertheless, some kayakers opt not to wear life jackets.

If you choose not to wear a life jacket, there are a few ways to be safe on the water.

  • Wear a wet suit or drysuit
  • Take a kayaking safety course
  • Paddle with a companion

Kayak Survival Vest versus Waterproof Paddling Suit

There are two fundamental types of flotation devices for kayakers: the life jacket and the waterproof paddle suit. Both have advantages and downsides, but it is up to the individual to determine which is best for them.

The most common type of flotation equipment is a life jacket. It is often constructed from foam and is intended to keep the wearer’s head above water. The greatest benefit of the life jacket is that it is quite comfortable and does not hinder movement. In warm weather, it might be cumbersome and uncomfortable to wear.

The kayaker’s waterproof paddling suit is an alternative option. It is constructed of watertight material and is intended to keep the wearer dry. The greatest benefit of the waterproof paddling suit is that it is extremely lightweight and does not impede movement. It can be unpleasant in warm temperatures and does not float as well as a life jacket.

Is It Illegal to Paddle a Kayak Without a Life Jacket?

State-specific regulations on life jackets vary. In some places, everyone in a kayak, regardless of age or experience, must wear a life jacket.

In other states, life jackets are only compulsory for children under a specific age. Before you go kayaking, you should always verify your state’s regulations regarding life jackets.

  • There is no federal law requiring kayakers to wear life jackets when on the water in the United States.
  • Many states, however, have their own regulations requiring kayakers to wear life jackets.
  • In California, for instance, all kayakers must wear a life jacket when on the water.

Even if it is not required by law, it is always a good idea to wear a life jacket while kayaking.

Price of Kayak Life Vest

Depending on the sort of life jacket you select. Typically, traditional life jackets are the least expensive alternative, beginning at approximately $30. These foam jackets are meant to keep your head above water if you fall into the water.

Inflatable life jackets are pricier, with prices beginning about $100. These jackets are equipped with inflating devices and are filled with air once deployed; hence, they offer greater buoyancy than foam jackets. Additionally, they are more comfortable to wear in warm weather since they retain less body heat.

What Do Kayakers Think of Life Vests?

According to some kayakers, life jackets are crucial safety equipment and everyone should wear one. Others argue that life jackets are a matter of personal preference and depend on the circumstances. There are advantages and disadvantages to both sides of the debate.

Some kayakers argue that life jackets are unnecessary for kayaking since they are experienced swimmers. Others argue that life jackets are necessary in the event of an emergency, such as a kayak capsize. Some kayakers claim that life jackets are cumbersome and restrict their mobility.

Final Reflections

  • It is always a good idea to wear a life jacket when kayaking.
  • The U.S. Coast Guard does not issue fines to kayakers without a life jacket, but it is a good idea to wear one.
  • Modern life jackets are more comfortable than those of the past.

How To Connect Two Computers To One Monitor Without KVM

The days of a massive computer system and the use of keyboard, video, and mouse (KVM) switches to link multiple computers together are long gone. Today, there are a variety of methods available for linking computers and displays without the need for cables or additional switches. The problems of today call for innovative approaches.

It doesn’t take long to find multiple solutions to the question “how to connect two computers to one monitor without KVM?” One could be tempted to test each one out separately. On the other hand, many of them are laborious to implement and may not even be useful.

In this article, we’ll show you the best practices for linking two PCs to a single display without using a KVM switch. We won’t waste any time, so let’s dive right in.
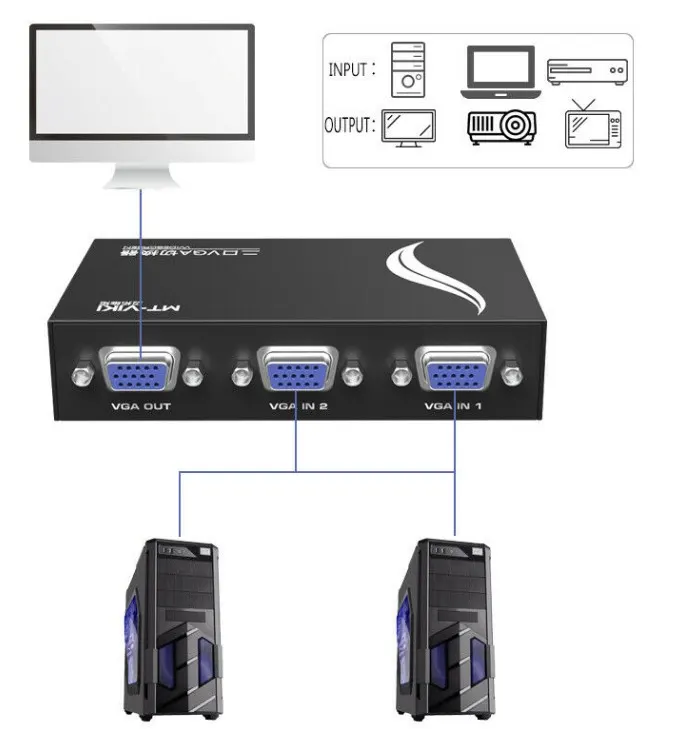


All You Need to Know About Your KVM Switch


The abbreviation KVM stands for “keyboard, video, and mouse.” It is the name of a piece of hardware that consists of numerous ports and allows users to connect additional computers to it. KVM switches are believed to be antiquated and obsolete computer peripherals. They were utilized in the past by aficionados of technology to connect many computers to a single keyboard, mouse, and monitor. KVM switches are now considered to be archaic and obsolete. KVM switches are still used by some experts, despite the fact that the majority of PC users nowadays prefer to use a single keyboard, mouse, and monitor. For instance, you’ll frequently see them at data centers.


Easy Methods to Connect Multiple Computers To One Monitor


Connecting numerous computers to a single monitor can be accomplished in two fundamental and efficient methods. The first way is by using the monitor ports, and the second is by using third-party software. If you want to connect two or more PCs to the same Monitor, follow the instructions below.


1. Connect


Modern monitors have multiple input ports. The most common ports are HDMI, VGA, Display Port, and DVI. Before you start trying them out, it’s better to have a little bit of knowledge about the ports and identify exactly which kind(s) your system has.

HDMI is the most common port type for monitors. It is short for “High-Definition Multimedia Interface.” HDMI is used, for example, to show files from your laptop on a bigger screen.

The Video Graphics Array (VGA) connector is the precursor to the HDMI port. First made in 1987, it was the best connection for showing videos on computers and compatible TV screens. It can easily be identified by having 15 “prongs” on the male end of the plug and the same number of holes in the female port. As previously stated, VGA connections have gone out of style and are mostly found on older systems.

The Digital Video Interface connector looks clunky compared to the others on this list. It’s relatively big with two long prongs around the port. It can carry both digital and analog signals and offers a better picture than VGA.

Display Port connectors are a peculiar species of cable that are often only seen on very specialized computer hardware. It is useful if you need to transfer massive volumes of data between two different systems, including audio, video, and other enormous file types. This pertains to the manner in which data is processed by Display Port.

Keep in mind that the majority of monitors only have one HDMI port, however that certain monitors may have multiple ports. For instance, the 144 Hz monitors that are currently on the market typically come equipped with a minimum of two HDMI connections, making it simple to connect them to a variety of different computer systems. On the other hand, it’s possible that certain older computers don’t have an HDMI port! It is highly recommended that you check the ports on both your monitor and the computer to which you want to connect your display (or monitors).

It is important to keep in mind that if you have a basic configuration with two computers and you want to connect them to a single monitor, the most effective way to do it is to seek for HDMI connections on the back of your PCs. HDMI ports are the most widespread, and they are wonderful for achieving greater resolutions. The fact that you are able to go from one computer to another just by navigating to a different menu on your current computer is the most significant benefit of this configuration.

One disadvantage that frequently comes up is the fact that many computers, particularly older models, do not have two HDMI ports available for use. This brings an end to the connection and stops you from achieving the highest possible resolution. We recommend that you go out and get an adapter for a reasonable price as a means of resolving this issue.

Take note that if you want to switch between computers, you should select the second computer when you do so. You can select the computer you want to use by utilizing the internal menu that is displayed on the monitor display.


Single KVM stands and occupies the larger version of the user’s pie chart. Follow these steps to connect your computers to one Monitor.

  1. Attach Display Port Attachment: Attach the display port to the VGA port (or other ports) by a cable. If you have an older system, you may need to buy an adapter.
  2. Attach DVI or HDMI Port Attachment: Attach DVI or HDMI ports to a different second cable.
  3. Input Menu Selection: Go to the input “menus” of the display monitor. You can do this just by pushing F1.
  4. It’s done! Now you can choose which monitor you want to use.



2. KVM Third-Party Software


In most cases, connecting two computers to a single display without the need of a KVM switch using various ports such as VGA, HDMI, or DVI is sufficient. However, often switching between monitors might be an annoyance in certain situations. There is a possibility that you may need to switch numerous times each day by selecting the monitor option once more and again, which may not be worth your effort. If you find yourself in this predicament, you should think about utilizing third-party software KVM switches.

It is possible to link two computers to a single monitor without using a KVM if you make use of one of the many third-party applications that are already on the market. There are paid versions of some of this software as well as free versions. You may either Google it yourself to find the greatest software, or you can follow our advice to find the best software and save time. Either way, you can discover the finest software.


ShareMouse


This program is reliable, well within one’s financial means, and productive. These three words are sufficient to convey the capability of the Share Mouse software to operate many computers at the same time.

The fact that you may easily install it for your monitor setup or use the free version that is readily available are both significant advantages. You also have the choice to purchase either the ordinary or the professional edition of the software. This extremely dependable program is compatible with Macs as well as Windows and Linux computers, and it may run on all three simultaneously.

The uniqueness of ShareMouse lies in the fact that it can take control of numerous personal computers at once. Relax while you exert extremely rapid and precise control over as many personal computers as you choose.


Synergy


Utilizing this very dependable KVM software, you may combine all of your computers into a single machine. By simply requiring the usage of a single mouse and keyboard, Synergy enables you to simplify, dominate, and take control of a number of different computer systems. Without the need for a KVM switch, you may now connect two PCs to a single monitor using this method.

Be aware, though, that the free trial of Synergy only lasts for the first thirty days of your subscription. Following that, you will be required to select one of their several packages.

Synergy is one of the most well-known brands in the field of third-party KVM software because it possesses the following specific features:

Swiftness: It doesn’t waste any time switching between monitors and it enables you to work without stopping.

The overall number of Synergy users is estimated to be well above 20 lacs at this time. Synergy is utilized by a significant number of the world’s Fortune 500 firms.

Easy installation: Its simple installation unites the PCs by consuming only a tiny bit of space, which helps clean your desk by removing unnecessary items.


Input Director


This is a fantastic virtual implementation of the KVM software that is designed to work with monitors running Windows. Input Director is compatible with PCs running Windows and functions exceptionally well in all versions of Windows 7, 8, 10, and 11.

The software known as Input Director is extremely safe because it transmits encrypted system data between computers. Additionally, it links two computers to a single monitor in an effective manner. Its premium features include the capacity to connect numerous computers to a single host, the ability to share clipboards, drop files, lock sync, and shut down the host.

Downloading the free software from only reputable websites will provide you peace of mind when it comes to using the software without cost.


Microsoft’s Garage Mouse without Borders


Another well-known KVM switch application for the Windows PC platform. The items that Microsoft offers require little explanation. They are without a doubt the very best.

Using the Microsoft Garage Mouse without Borders, you are able to operate several computers from a single monitor at the same time. Additionally, you are able to interface amongst the computers in the same way that a captain would control a vast fleet of ships in the ocean.

A single click of the mouse cursor is all that is required to take control of the switch. Microsoft’s top-secret software was developed without the use of KVM switches to ensure the highest level of privacy and protection. It does not cost anything at all.


Remote Desktop Protocol


This is yet another simple method that can be used in place of KVM switches in order to link two or more PCs to a single monitor. The acronym RDP refers to the Remote Desktop Protocol, which is exactly what it sounds like: a method for controlling things on your desktop from a remote location. It is a hassle-free software that can be readily downloaded from Chrome and used as an effective software KVM switch. You may use it in either console mode or full-screen mode.

In addition to the Chrome remote software, there is a great deal of other software that is now accessible and may be readily installed. Have a reliable internet connection available for the best possible outcomes.


Frequently Asked Questions

How Can I Switch between Two or More Computers?


A KVM switch is the ideal option, as there is no conventional procedure for using a keyboard. A KVM switch enables one computer to receive input from another computer’s keyboard, mouse, and one or more additional monitors.


Keep in mind that KVM switches typically come equipped with USB ports; however, if the ports on your accessories (mouse, keyboard, etc.), are designed to work with a different kind of port, we advise that you choose a KVM that is compatible with the monitor you intend to use (s).


How Can I Connect Two Computers to a Single Monitor?


Having many monitors in a small space sometimes looks messy, especially if you have other accessories. The best solution is to connect 2 computers with a third monitor and make it a simple setup that you can control by using just one mouse and keyboard. The three best ways to do that are:


– Use a KVM switch to control multiple computers.

– Push two cables from the first and second computer to the third Monitor without a KVM.

– Distant desktop connection.

What is the Best KVM Software?


Synergy, Input Director, and ShareMouse are three of the most well-known pieces of KVM software. The option to swap monitors without any fuss is the standout feature that sets this KVM software apart from similar products on the market.


You may effortlessly switch between applications by pointing the mouse pointer to the edge of the screen on the computer. If you are concerned about cost, your best bets are Input Director, Synergy, and ShareMouse. While Input Director is only compatible with Windows, Synergy and ShareMouse are both compatible with Mac OS X, as well as Linux.


What Monitor Ports do I need?


Modern monitors are diverse in design and performance. The most common types of monitor ports are:

HDMI (High-Definition Multimedia): These ports are very popular and are best known for providing high resolutions.

VGA (Video Graphics Array): Rare, but these ports were the predecessors of HDMI. Still found in older versions of monitors.

Display Ports: Common. Known for providing excellent video resolutions.

You can choose any of them depending on what you need and what you have to work with.


What is the Difference between Dual Monitor KVM Switches and Multi-Monitor KVM Switches?


The names of these two different types of switches each give some indication of the distinction between them. Multiple computers can be linked together with a KVM switch by way of a twin monitor switch, which allows for two monitors to be shared amongst the machines. A multi-monitor switch performs the same function for a number of displays greater than two.

See more :

  • sortvis.org
  • Best 32 Inch Monitors
  • Best Curved Monitor For Office Work
  • Best Monitors For Photo Editing


IN CONCLUSION


The approaches that have been discussed thus far are, without a doubt, the most effective ways to connect two computers to a single monitor in the absence of a KVM. This holds true both in terms of connection (LAN/WAN) and operating system (Windows, Mac OS, Linux).

It is possible to use KVM switches for a large data center if that is your intention. However, KVM software is recommended for use on a home computer. The KVM software does not require any additional storage space, it is inexpensive, and there is no need to wait for a shipment to arrive in the mail.